How to Upload a File in a Html Form
1 of the virtually fourth dimension consuming thing most forms is definitely uploading files, sometimes you may need an HTML class with file upload functionality, in this guide nosotros are going to starting time by as simple as possible than we are going to spring to avant-garde techniques
After you read this guide
- You can create a file upload form in v steps, under 3 minutes
- Yous can get email notifications from your HTML form
- You tin export your contact grade submissions equally CSV and JSON
- You lot don't take to bargain with any back end code stuff (Php, Go, Node.js etc.)
Stride one — Create your HTML Course
Starting time, y'all'll need an HTML form in your web folio, which is not a big deal, a basic HTML upload form volition await like this.
<form action="#" method="POST" enctype="multipart/grade-data"> <label for="nameInput">Name</characterization> <input type="text" id="nameInput" /> <label for="messageInput">Bulletin</label> <textarea id="messageInput" cols="30" rows="two"></textarea> <input type="file" id="pictureInput" /> <push type="submit">Submit</button> </form> Your form element have to include enctype="multipart/form-information" to upload files A basic form in HTML is just a static matter that's only obligated to deliver the user input to a back-stop script. Yous have to betoken the class to some script to actually procedure the information.
By default, file input only allows y'all to cull a single file from your device, if you want it to allow multiple files and so you can use the multiple attribute
<input type="file" id="pictureInput" multiple /> Here's an case form for you
Step two — Structure your grade data
In order to send your form data to a script you lot need to name each of your fields so the script can match the values with the names (or the cardinal).
You can add together as many fields as you desire.
Let's uniquely name each of our fields using name attribution.
<grade action="#" method="Post" enctype="multipart/form-information"> <label for="nameInput">Name</label> <input type="text" id="nameInput" proper name="proper noun" /> <label for="messageInput">Message</characterization> <textarea id="messageInput" cols="30" rows="two" name="message"></textarea> <label for="pictureInput">Picture</characterization> <input type="file" id="pictureInput" name="picture" /> <button type="submit">Submit</push> </form> Now we have a file upload class that'southward fix to deliver the data to a script.
Step iii — Point your form to backend
There are two means to handle this stride, this part is the about time consuming stuff due to you have to check files, rename them uniquely save to database and upload to somewhere along with you'll also probably going to need a email server to transport emails, which yous e'er have to make certain that emails are delivered.
Option 1 — Create your own form back-end
You need to have a form backend to collect submissions and files from your form, this is typically washed past some backend languages such as PHP, Node.js, Go etc.
We have a detailed guide on How to create a grade backend with file upload
How to create an HTML contact form with file upload | Actionable Guide
In this tutorial, we are going to create a sample app using Limited.js to uploadfiles to Amazon S3, then we are going to save our submission to the MongoDB Prerequisites for the tutorialI don't desire to cover some things that would over-complicate this tutorial,therefore I presume you know how to:…
 Formcarry Weblog

Take a wait at that post if you lot want to build it on your own
Selection 2 — Use Formcarry - File upload ready course backend
Formcarry is a gratuitous, no-code course backend for your HTML forms, in this tutorial I'm going to show you how can you lot create a file upload class under 3 minutes while it at to the lowest degree takes one hours if you exercise information technology on your own. Likewise you tin get notification emails from your form, protected from spam by default and integrate your submission data with other apps using Zapier.
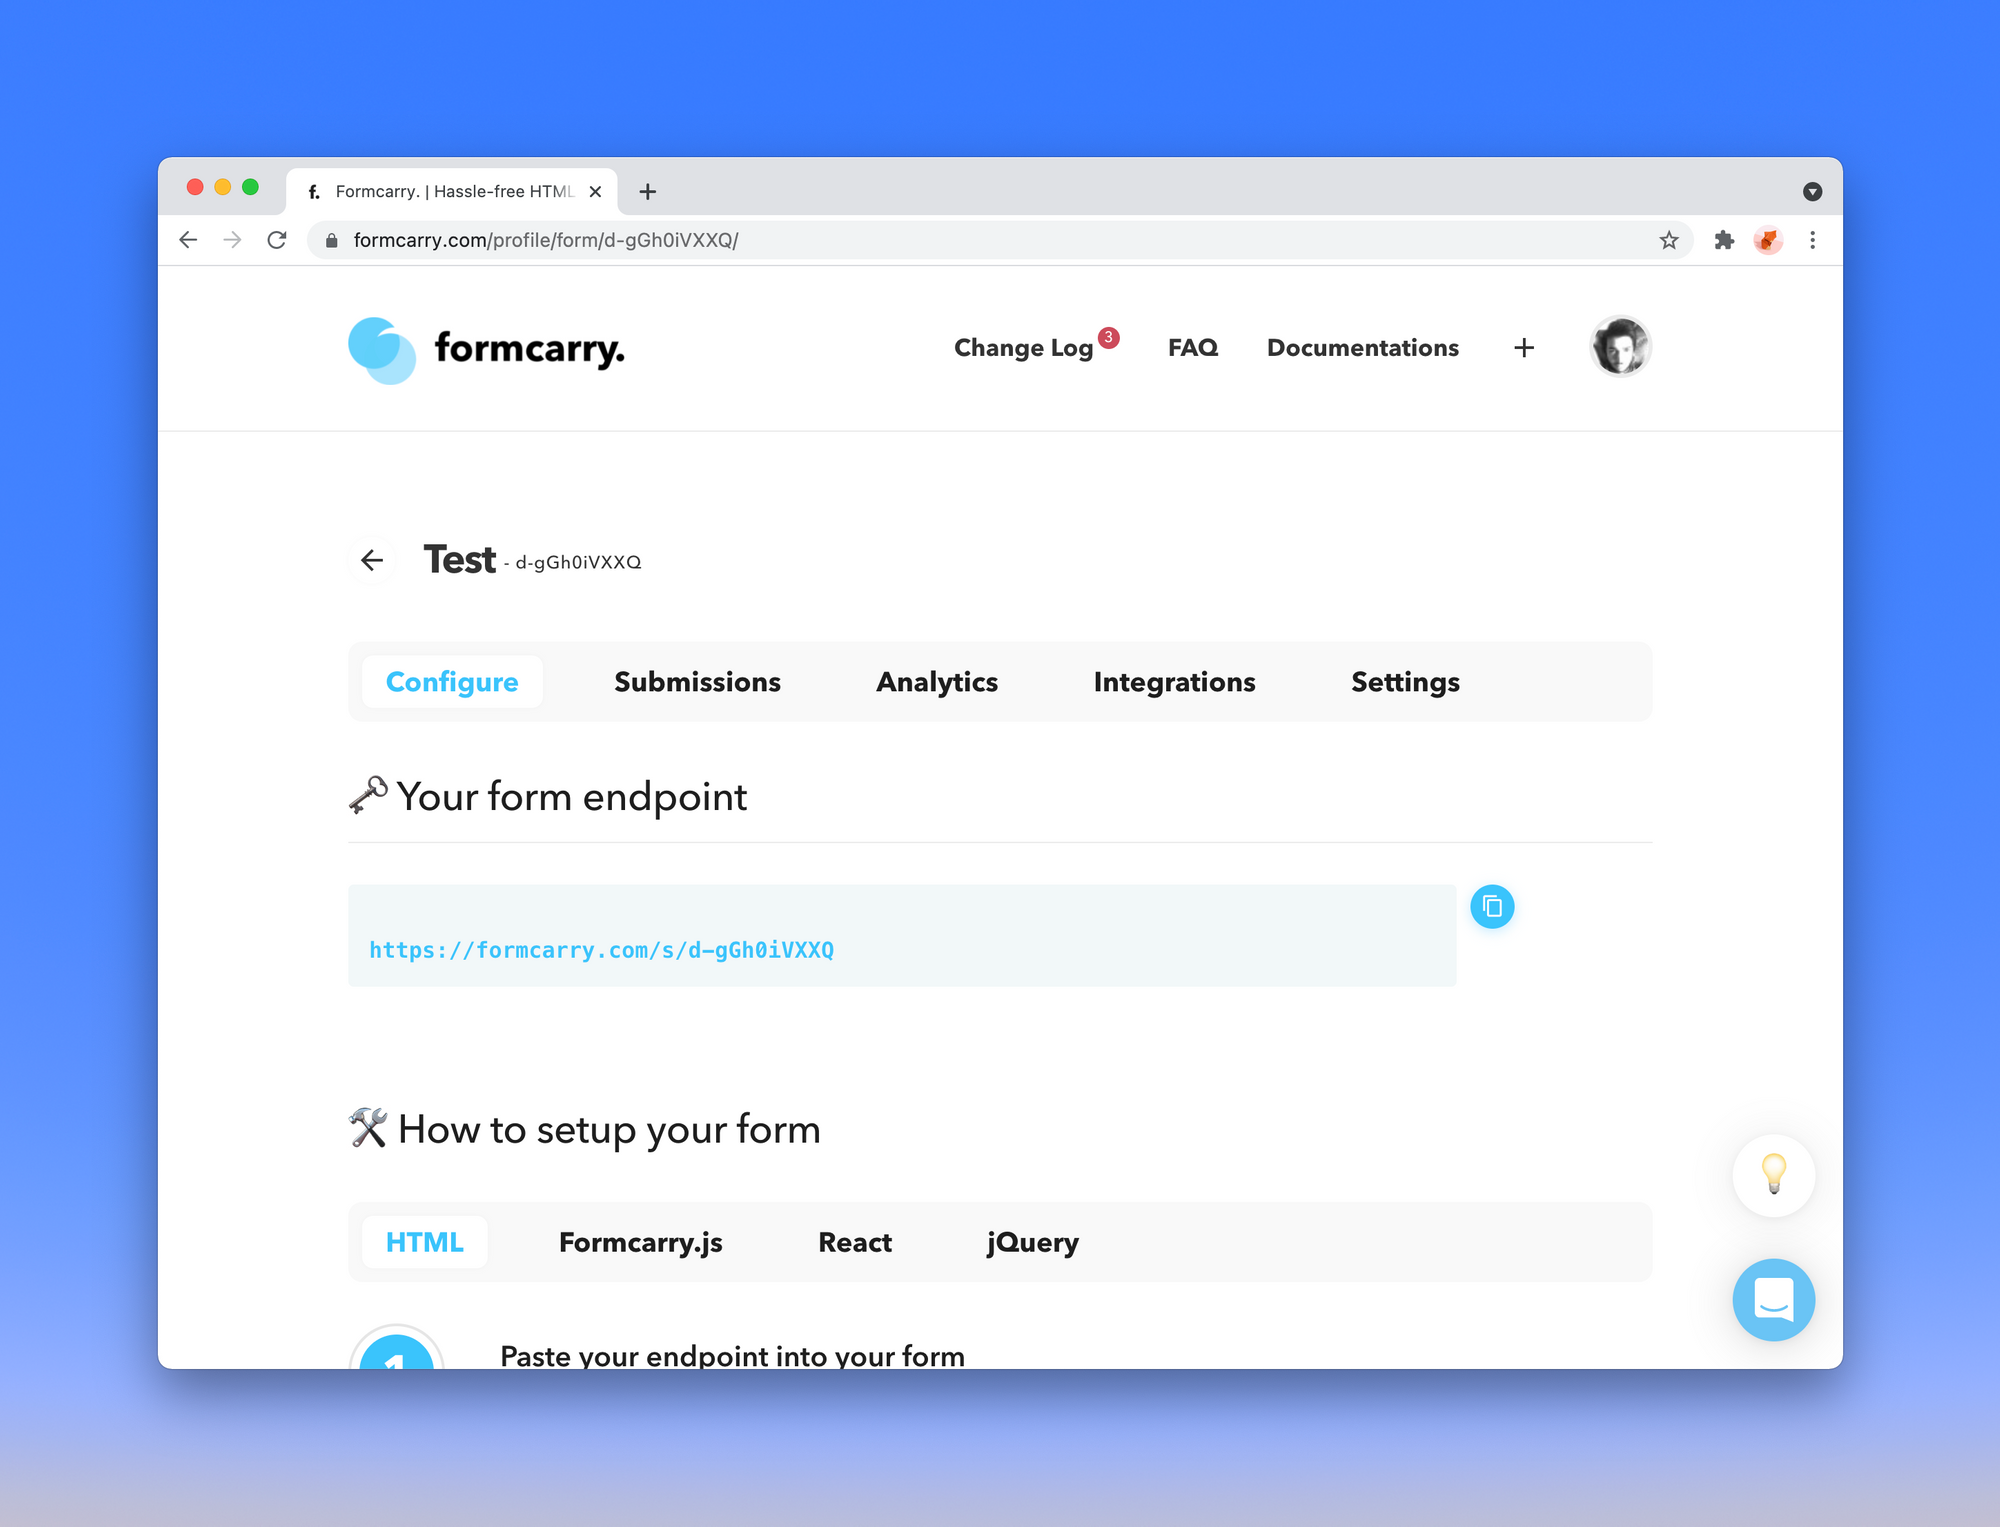
Sign Up to formcarry for free, then click Add New to get your unique form backend URL
So re-create your unique form endpoint
Step 4 — Integrate your form with formcarry
Copy your endpoint and paste it into activeness office of your form
- <course action="#" method="POST" enctype="multipart/form-data"> + <class action="https://formcarry.com/s/{Your-Unique-Endpoint}" method="POST" enctype="multipart/class-information"> Pace v — Collect submissions
Let's try out our form:

Now, permit's take a expect at our dashboard:
That's all you lot need to upload files when you are using formcarry, that'southward how mortiferous simple it is. We have covered the basics, now allow'south jump into something a fiddling bit advanced.
Uploading files from your form using Javascript
Uploading files with raw HTML form is not so time consuming, only if yous are trying to upload it with javascript it'due south possible that yous are going to spend some fourth dimension on figuring out what's going wrong.
First add our course id="formcarryForm"
- <course action="https://formcarry.com/s/{Your-Unique-Endpoint}" method="POST" enctype="multipart/form-data"> + <form id="formcarryForm" method="Mail" enctype="multipart/form-data"> Important note before we switch back to code
Common error while implementing a file upload in javascript is setting Content-Blazon as multipart/form-data while this is partly true, it'south also very wrong approach.
Whatever content-type starts with multipart/* is required to have boundary, based on my own experiences and the support asking we got from formcarry, nosotros establish out the ideal manner to upload files from javascript is using the FormData class
const formElement = document.getElementById('formcarryForm') const information = new FormData(formElement) this will become each field from your form, just if you want to add some additional data, that you lot don't want to store in the HTML, yous can add together your boosted data like that;
const formElement = document.getElementById('formcarryForm') const data = new FormData(formElement) information.append('language', window.navigator.language) Uploading files from your form using Fetch API
Fetch API is an embedded asking API for javascript, it'south widely supported amid mod browsers, cheque Fetch API compability.
Add this script before the </body> tag
<script> const formcarryForm = document.getElementById('formcarryForm') const sendFormData = async (event) => { // this will prevent your form to redirect to some other folio. issue.preventDefault(); // get our form data const formData = new FormData(formcarryForm) // add some additional data if you want // formData.append('language', window.navigator.language) fetch('https://formcarry.com/s/{Your-Unique-Endpoint}', { method: 'POST', body: formData, headers: { // you don't accept to ready Content-Blazon // otherwise it won't work due to boundary! Accept: 'application/json' } }) // convert response to json .and so(r => r.json()) .and so(res => { panel.log(res); }); } // Bind our sendFormData part to our forms submit event formcarryForm.addEventListener('submit', sendFormData); </script> Uploading files from your grade using Axios
Axios is an promise based HTTP client for the browser and node.js, it'southward lightweight and a common library for making HTTP requests, it'due south a dainty alternative for Fetch API
Add together this script before the </body> tag
<script> const formcarryForm = certificate.getElementById('formcarryForm') const sendFormData = async (effect) => { // this will preclude your form to redirect to some other page. outcome.preventDefault(); // get our form data const formData = new FormData(formcarryForm); // add some additional data if you want // formData.append('language', window.navigator.language) axios .post("https://formcarry.com/s/{Your-Unique-Endpoint}", formData, { headers: { // you don't have to set Content-Blazon // otherwise it won't work due to purlieus! Accept: "awarding/json" }, }) .then(office (response) { console.log(response); }) .catch(function (fault) { // this is an error related to request console.log(mistake); }); }; // Bind our sendFormData function to our forms submit event formcarryForm.addEventListener('submit', sendFormData); </script> Uploading Files from your form with React
Using FormData class in React is a little flake tweaky, simply let'southward take a look how to upload files with React.
We need to apply useRef to access our form element, hither'southward a sample component for you to upload files with React:
import React, { useRef } from "react" const Grade = () => { // create a Ref to admission our class element const formRef = useRef(cipher) const sendFormData = async (upshot) => { // this will prevent your grade to redirect to another folio. event.preventDefault(); if(!formRef.current){ console.log('something wrong with form ref') return } // get our grade information const formData = new FormData(formRef.current) // add some additional data if yous want // formData.append('language', window.navigator.language) fetch('https://formcarry.com/s/{Your-Unique-Endpoint}', { method: 'Mail', body: formData, headers: { // yous don't have to set Content-Blazon // otherwise it won't work due to purlieus! Have: 'application/json' } }) // catechumen response to json .then(r => r.json()) .then(res => { console.log(res); }); } return ( // demark formRef to our form element <form ref={formRef} onSubmit={sendFormData}> <characterization htmlFor="nameInput">Name</characterization> <input blazon="text" id="nameInput" name="name" /> <characterization htmlFor="messageInput">Message</label> <textarea id="messageInput" name="bulletin"></textarea> <characterization htmlFor="pictureInput">Picture</label> <input blazon="file" id="pictureInput" name="picture" /> <button type="submit">Submit</button> </form> ) } export default Form Decision
I promise this guide was helpful for you, at formcarry our mission is providing an easy mode to handle your HTML forms also we are trying to release class related in-depth guides, make sure yous've subscribed our newsletter to become the latest posts.
cockburn-campbelltromis.blogspot.com
Source: https://formcarry.com/blog/how-to-create-a-file-upload-form/
0 Response to "How to Upload a File in a Html Form"
Post a Comment